Heute hab ich ein ganz besonderes Zuckerl für euch: meine „Online-Freundin“ Tamara schreibt einen tollen Blog über Mode und Styling und hat ein DIY Hochzeitsmake-up für euch zusammengestellt!! Sie hat unglaublich viele tolle Fotos dazu gemacht, ich glaube nach denen schaff sogar ich diesen Look nachzumachen! 😉 (Es ist alles auf Englisch, falls ihr Probleme mit dem übersetzen habt sagt bitte Bescheid, dann helf ich euch gerne ein bisschen!!)
Today I have a special guest post for you: my online-friend Tamara writes a great blog about fashion and styling and she did a DIY bridal make-up for you!! She took tons of pictures for you, I think even I could recreate this look! 😉
Hi Fit and Happy readers!! My name is Tamara and I blog about fashion, makeup and beauty over at Ordinary Fashionista.

Though we’ve never met, I’ve “known” Ulli for about 5-6 years now. We originally connected through the forums at Muscle and Fitness Hers, and I’ve always felt that we were sisters from another mother because we share a lot of things in common.
I’m not a makeup artist, nor do I pretend to be one (I’m actually an optometrist), but I have developed some skill at applying makeup. I did all the makeup for my sister’s wedding and I occasionally feature makeup tutorials on my blog to show other non-makeup artists like myself that fun makeup looks are attainable by the average person.
When Ulli asked me to do a guest post for her while she was enjoying her wedding and honeymoon, I knew immediately that I wanted to do a soft, yet beautiful makeup look that would work both for a bride, bridesmaid or even wedding guest!
I knew I also wanted the makeup I used to be affordable because I know that not everyone can afford to use Urban Decay or MAC (my go-to brands for eye makeup).
I chose to use E.L.F. brand eye makeup because, besides being super-affordable, its what we actually used on my sister’s bridesmaids. *FYI: I am in no way connected to ELF. They’re not paying me for this post…they don’t even know I’m using all their cosmetics for a makeup look. I just happen to like their quality and find them to be very affordable.
For this look, I’m going under the assumption that you have facial lotion, foundation, concealer and powder as well as a lipstick color that you like and works for your coloring.
I’d also recommend a good eye shadow primer (I LOVE Urban Decays Primer Potion), but if you don’t have/don’t want to buy any, you can use concealer on your eyelids before you apply your shadows.
For a bridal look, you want to be absolutely gorgeous, but not so heavily made-up that it looks like you’re going clubbing. The smokey eye is probably the most sought after makeup look, but it can look rather harsh for a bride. The trick to a bridal smokey eye is to lighten up the colors and use grey’s/mauvey-purples instead of dark blacks and keep the inside half of the lid bright and shimmery.

The makeup I used in this look are:
1. ELF Essential Brigthening Eye Color Quad in Day 2 Night ($1)
2. ELF Studio Eyeliner in Black($3)
3. ELF Dramatic Lash Kit in Black($1)
4. ELF Blush in Mellow Mauve($3)
5. ELF Essential Regular and Waterproof Mascara Duo in Black($1)
6. Bronzer(mine is Rimmel that I’ve had forever, but ELF makes one for $3)
Total $=$12(not too shabby!)
You’re also going to need some makeup brushes. Most of mine are from MAC, but if you already have a set, those will be fine to use. If you don’t have any brushes or you’re missing some of the ones I list, you can get those from ELF as well.

1. ELF Studio Stipple Brush($3)
2. ELF Studio Powder Brush($3)
3. ELF Studio Flawless Concealer Brush(I call it my fluffy blending brush) ($3)
4. ELF Essential Eyeshadow Brush ($1)
5. ELF Essential Smudge Brush($1)
6. ELF Essential Eye Crease Brush ($1)
7. ELF Studio Small Angled Brush($3)
Total $=$15
So, you can put together a beautiful wedding kit for under $30(certainly less than you would spend to get your makeup done professionally!).
I would recommend if you’re going to attempt your own wedding makeup or that of a friend/family member that you go through multiple trial runs so that you are confident in your application. For my sister’s wedding, we did at least 5 trial runs so when we got to the actual day of the wedding, I was able to very easily and quickly apply her makeup.
Now that you have all your supplies together, let’s get started!
First apply moisturizer all over your face and give it a few minutes to sink in. I use Burts Bees Radiance Day Cream.
Then apply concealer below your eyes and on any blemishes/red spots. I tend to get red around my nose and chin so I make sure to apply concealer to these areas.
Instead of just applying concealer directly below your eyes, draw a line down the side of your nose then up and out to the outer edge of your eye and fill that in with concealer (it should be like a triangle under you eyes). This helps brighten the whole area and adds some depth to your face.
 Next, apply foundation to your whole face, making sure to blend well.

Your face will look a little flat, but that’s okay. Now we’re going to add some shadows/contour a bit.
Grab your powder brush swirl it around on your bronzer, tap it gently on the side of your sink so any loose bits fall off, then gently tap it just along the underside of your cheekbones(in the “hollows” of you cheeks so to speak), all the way into your hairline.

I like to apply a little to the sides of my nose and along my hairline at my forehead.

Next use your fluffy blending brush to pick up some of the lightest of the eye shadows and apply it down the center of your nose and along the tops of your cheekbones for highlight. If you don’t have a fluffy blending brush, you can use your fingers for this part! 
Now it’s time to work on your eyes. Apply your eyeshadow primer(or concealer) to your entire lid. I just use my fingers. Works great!
Using your flat eye shadow brush, apply the lightest shadow (the same one you used for highlighting) to your whole lid, up to the eyebrow.

Using your small angled brush, apply your cream liner in a thin line along your upper lid, winging up and out at the outside corner for a delicate cat-eye. I like to make my line slightly thicker as I get towards the outer edge of my eye, which I accomplish by slightly laying my brush down as I draw my line (as opposed to holding it straight out).

Now line your waterline. Pull your lower lid down apply liner to that lip that’s just inside your lashes.

This is how it should now look.

Now using your crease brush, pick up the dark grey color and apply it into the crease of your eye starting at the very outer corner and going about halfway across the lid.

Fill in the outer lid with this color, then pick up some of the purple and blend it over top of the grey. Next, use your eyeshadow brush to apply just purple to the middle 1/3 of the lid.

Using your smudge brush, smudge in a mixture of grey+purple along your lower lash line.

Now apply your false lashes. I’ll confess that I did not put any on for this tutorial, but I 100% recommend them if you are getting photos taken. They make your eyes “pop” in pictures and will not look fake!
Once your lashes are on, apply several coats of mascara to blend them with your real lashes. I also like to go in with my fluffy blending brush and re-apply the lightest color shadow to my inner eyelid as well as under my eyebrow.

Finally, use your stipple brush to lightly dust your blush just below and along your cheekbones.
 You will want to put on more blush than you think is necessary because the camera will wash you out. I recommend having a camera handy to take a few test shots till you get to the right level of color.

I would wait until right before pictures/ceremony before apply lipstick. And definitely carry your lipstick with you in case you need to reapply as the evening goes on!
I recommend a nude/neutral/pink lip for your wedding. Dark reds/purples look good in photos but your want to be soft/feminine and most men hate dark lipstick…so save that for later! That being said, if you’re a really bold person, go for a dark lip! I love Ruby Woo or Russian Red for MAC. Not only are the fabulous in photos, but they last for hours without needing to be reapplied and they won’t smudge when you kiss your new husband!
I used L’Oreal Infallible Never Fail Lipcolour Compact in Azalea with Tarte’s Maracuja Divine Shine Lip Gloss in Amused.


There’s a bonus to this blog post…not only am I showing you a bridal makeup look but I’m also going to show you a super-quick and easy hair style that would work for either a bride or bridesmaid!
 While I was doing my makeup, I had my hair in hot curlers. I took it down and sprayed it with a finishing spray. After it dried, I ran my fingers through the curls to break them up a bit. You could also curl your hair with a curling iron. Curls work best on hair that is slightly dirty, so if you can avoid washing your hair for a day or two before the wedding it’ll do better.

Then I pulled back the top section (from above my ears back) and pinned it at the upper back part of my head (if you push it up a little bit you get some oomph and height).

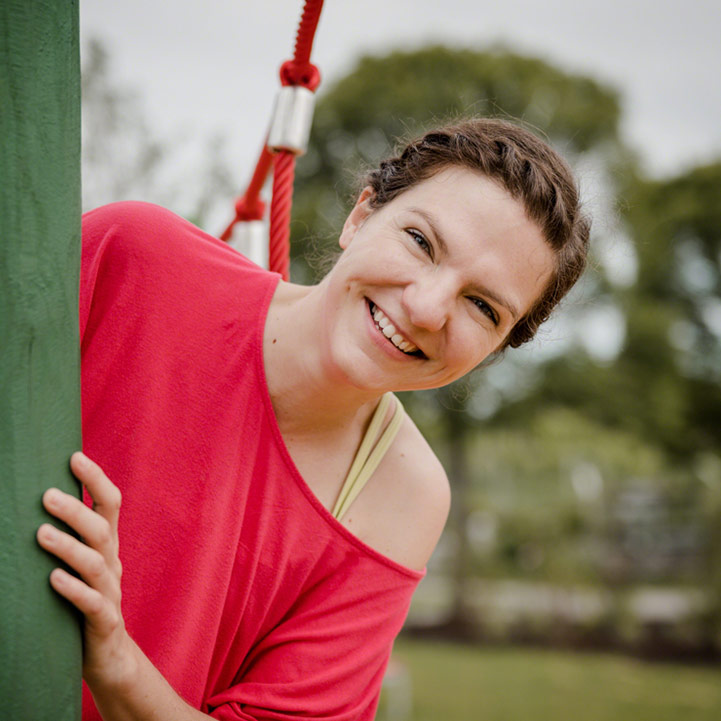
Weird facial expressions in some of these photos!
Next gather all your hair and pull it to the side for a side pony tail. I used a clear rubber band. Finally wrap a few strands of hair around the rubber band and pin them so that the rubber band is fully covered. You can choose to add a flower/hair pin here as well.

Finish with tons of hair spray to keep your curls in place and now you’re ready to be the bridesmaid or the Bride:

I hope you enjoyed this tutorial and if you like what you see, stop by my blog sometime! I’d love to hear from you.
Ps-If you try this makeup look, I’d love to see a picture! Send it to ordinaryfashionista.gmail.com
-Tamara
Wow, vielen lieben Dank nochmal an Tamara für das tolle Tutorial!! Die vielen Fotos sind echt super, ist sie nicht hübsch?? Diese Haare sind einfach ein Traum!!
Wow, thanks again Tamara for this great tutorial!!! The many pictures are great, isn’t she pretty?? I love her hair, its a girls dream!! 😉
Schönen Tag wünsch ich euch noch!!! / I wish you a great day!

Link des Tages / Link of the day